


- Homepage
- Projects
- Autodesk Construction Cloud/BIM 360
- Autodesk Desktop Connector
Autodesk Desktop Connector
- ACC Quick Start Guide
- ACC Document & File Review Workflow
- How to upload files in ACC
- BIM 360 Quick Start Guide
- BIM 360 Account Setup Instructions
- BIM 360 Plan Review Process
- BIM 360: Creating, Tracking, and Closing Project “Issues”
- BIM 360 Sheet Name/Number & Document File Versioning
- BIM 360 Standards Variance Request
- Change Order Proposals Over $50K
- Sign into the BIM 360 Mobile App (iOS)
- Autodesk Desktop Connector
- Adding New Employees to Tracker & BIM 360
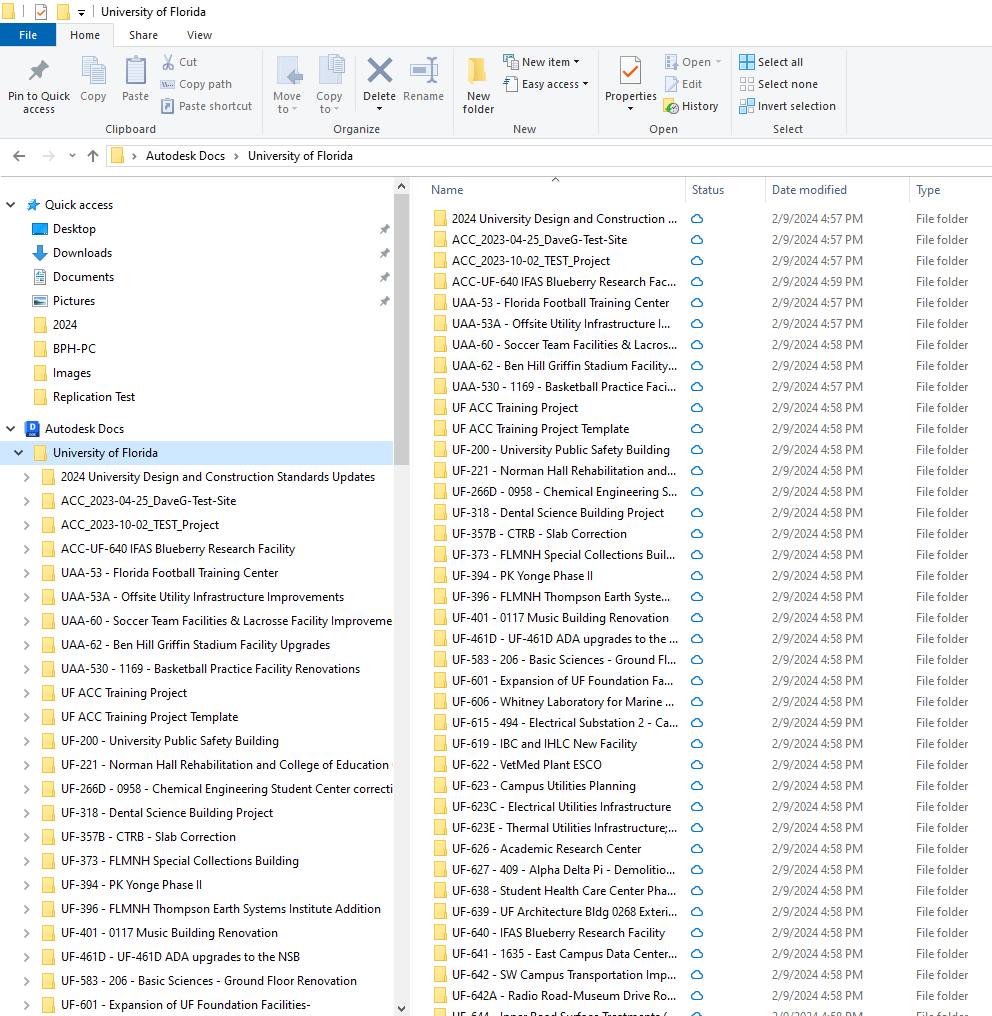
Autodesk Docs (Autodesk Desktop Connector) is an application that integrates ACC and BIM 360 document folders with your PC’s file management system, giving you the ability to “drag and drop” files and folders. Autodesk recently renamed this application from “Autodesk Desktop Connector” to “Autodesk Docs.” However, Autodesk uses the names interchangeably in its online documentation. We’ll use the acronym ADC in the instructions below.
Information on how to use ADC is available here: https://help.autodesk.com/view/CONNECT/ENU/?guid=What_Is_Desktop-Connector
Here are the steps for installing and updating ADC:
If you have an administrator account on your desktop:
1. Go to https://help.autodesk.com/view/CONNECT/ENU/?guid=GUID-03D59AAD-65B0-45E3-84F2-A12AAA5BB267 to download the latest version of the application
2. If you already have ADC installed, exit the program by right-clicking on the ADC icon in your system tray and selecting “Exit”
3. Locate the DesktopConnector-x64.exe file in your Downloads folder. Double-click the file to extract and install it in the C:\Autodesk\ folder.
If you do NOT have an administrator account on your desktop:
1. Submit a myIT ticket to UFIT Technology Support Services (TSS)
2. Please include the following information in your ticket:
Your Name
Email
Phone
PC Name: TSS-PDC-123
Office Location (Bldg/Room)
3. Give the TSS representative the web address for downloading the latest version of the ADC application: https://help.autodesk.com/view/CONNECT/ENU/?guid=GUID-03D59AAD-65B0-45E3-84F2-A12AAA5BB267. You can include this in the ticket description.
4. If you already have ADC installed, the TSS representative will need to exit the ADC program before installation can be completed
After the application is installed, you will be able to use ADC by opening Microsoft File Explorer and clicking on the “Autodesk Docs” icon and navigating to your projects located under the main “University of Florida” folder.